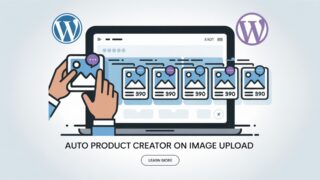
What is eStore Auto Product Creator?
eStore Auto Product Creator is a WordPress plugin that instantly creates a WP eStore product for every image you upload.
No more copying, pasting, or repetitive data entry—just upload and your products are ready for editing and sale.
Getting Started
1. Install and Activate the Plugin
- Go to Plugins > Add New in your WordPress dashboard.
- Click Upload Plugin and select your
estore-auto-product.zipfile. - Click Install Now and then Activate.
2. Set Your Default Product Options
- Go to Settings > eStore Auto Product Creator in the WordPress admin menu.
- Choose your default product price, description, and category.
- Click Save Settings.
Tip: You’ll see a blue “Batch Descriptions” help box—read this for advice on batch uploads and settings.
3. (Optional) Set Per-User Product Defaults
- Any user who can upload media (Admins, Editors, Authors) can set their own defaults.
- Go to Users > Profile (or Edit Profile) and scroll to the eStore Auto Product Creator Settings.
- Set your preferred price, description, and category.
- Click Update Profile.
Your settings will override the global defaults for your uploads.
4. Upload Your Images
- Go to Media > Add New (or use any image uploader in WordPress).
- Drag and drop your images (single or multiple at once).
- For every image, the plugin will instantly create a new eStore product with your chosen defaults.
- Product titles are automatically cleaned up and formatted (no messy filenames).
5. Edit or Complete Your Products in eStore
- Go to WP eStore > Manage Products.
- Find your newly created products.
- Edit details as needed (price, description, category, and especially the Digital Product URL if you want to provide downloads).
- All fields are fully editable—use eStore as you normally would.
6. Changing Settings for Batch/Seasonal Uploads
- Want to upload a new batch with different settings?
- Just change the price, description, or category in the plugin settings (or your profile).
- Click Save, then upload your new images.
- Each upload batch uses your most recent settings.
7. How Categories Work
- Categories must be created first in WP eStore’s own category manager.
- When you select a category in plugin settings, your new products are assigned to that category automatically.
- The plugin uses the official eStore category-product relation table for best compatibility.
8. Digital Product URL is Blank by Default
- For security and workflow reasons, new products do not have a Digital Product URL filled in.
- Add your download or file link later in eStore when you’re ready.
Troubleshooting
No categories showing?
- Make sure you have at least one category created in WP eStore.
Products not appearing after upload?
- Confirm the plugin is active.
- Check your eStore Manage Products screen.
- Make sure you are uploading image files (not PDFs or other file types).
Error messages about missing tables/fields?
- Your eStore install may be customized or missing core tables.
- The plugin detects most standard/custom setups, but contact support if you see repeated errors.
Best Practices & Tips
- Upload images in batches for faster catalog building.
- Set batch descriptions to speed up product creation for themed sets (e.g., Easter, Christmas).
- Use per-user defaults to streamline workflow for teams or volunteers.
- After uploading, review/edit new products in eStore to finalize details and add download links.
Uninstalling the Plugin
- Deactivate and delete via Plugins > Installed Plugins.
- No products or eStore data are removed when uninstalling—only the automation stops.